Installation Guides…
Trunk Weatherstrip Installation Guide
READ CAREFULLY BEFORE YOU BEGIN INSTALLING TRUNK WEATHERSTRIP
SHOW YOU CARE for your car with new trunk weatherstripping. Did you know that old, worn-out trunk seals may hold water that can cause rust in the groove around your trunk? You can help prevent leaks and excess dust, as well as give your trunk a fresh new look with our easy-to-install SUPERSoft trunk weatherstrip.
 GENERAL HINT:
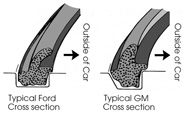
Proper fit and function of this trunk weatherstrip extrusion depends upon the correct installation (Figure 9A). Do not use your old flattened strip as a guide. Read the entire instructions here before beginning.
A) PREPARATION:
Compare your old seal to the new one to make sure that the new seal will do the job. Remember, old seals are flat and your new sponge rubber is very forgiving in the case of slight difference in shape. Make sure you take note of which side of your strip faces toward the trunk!
B) REMOVE OLD SEAL:
Apply liberal amounts of a release agent as you pull until you have removed all weatherstripping. Make sure any old adhesive, debris or rubber is removed with a scraper and even vacuumed if necessary.
C) ADHESIVE BEAD:
Check your trunk lid alignment and then run a bead of adhesive inside the groove as you install the strip.
D) INSTALL WEATHERSTRIP:
Start at the center above the lock cylinder and begin to insert your new weatherstrip. Fold your strip in half and start with the half-way point. Make sure both inside and outside edges are tight and sealed.
E) GLUE AS YOU GO:
Start about 8 inches from the center and begin to glue around each side as you go until you get to about 8 inches from the end. Carefully cut the ends squarely to match together, allowing a 1/4 inch to overlap. At this seam, apply adhesive to the trunk channel and a small amount to the ends of the strip. Hold the ends together for a moment and then insert. Close your trunk and open it, making sure no glue oozes out and shows. Wipe up any excess glue immediately.
| << Pillar Post Weatherstripping | Technical Info | Quarter Window Weatherstripping >> |
